Joe’s Plumbing involves the distribution of water, waste, and other fluids to and from fixtures like sinks, toilets, and appliances. It also includes the installation and repair of pipes.
Plumbers often work in commercial and industrial settings. They must collaborate with other professionals to ensure plumbing systems integrate seamlessly into building projects.
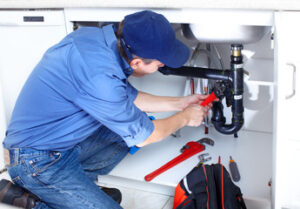
Occasionally, faucets need repairs to keep them running smoothly. Fortunately, replacing small parts like washers and O-rings is easy and inexpensive. Regular cleaning can also prevent mineral and grime buildup. If a leak persists, it may be time to call a plumber for a professional repair.
Examine the leaking faucet closely to determine where the problem is occurring. Leaks from the spout or base will require a different fix than a drip from the handle. Turn off the water supply valves under the sink to prevent water from flowing while you’re working. Open the faucet in its center position to relieve pressure and let any remaining water drain out.
If the valve seat is leaking, it will need to be replaced. To do so, first remove the faucet handle. Then, pry off the decorative cap (if applicable) and unscrew the set screw with a screwdriver. This will expose an Allen screw that needs to be tightened. Use a wrench to loosen the screw, then lift off the handle. Next, unscrew the dome assembly from underneath the handle and pull it off.
The valve seat may be clogged with mineral deposits, which can cause it to leak. To clean the seat, remove the faucet handle and pry off the decorative cap (if applicable). Then, remove the retaining nut or clip from the valve stem to access the screw that holds the stem in place. Undo the screw and remove the stem, then clean the valve seat with white vinegar or another mild degreaser. After the seat and O-ring are cleaned, reassemble the faucet, turn on the water and test for leaks.
If the stem or cartridge is leaking, it will need to be removed and replaced. Obtain the new part from a hardware or plumbing supply specialist and follow the instructions to remove the old one and install the new one. Once the new part is in place, turn on the water and test for leaks.
Replacing a regulator can be difficult because it’s usually installed behind the wall. Before beginning the project, put a bucket beneath the current regulator to catch any water that might spill out. Start by shutting off the water at the main valve, then opening the faucet in the “off” position to relieve pressure and drain the pipes. Then, use a pair of channellock pliers to loosen and remove the existing regulator. Replace the old pipe end with the new end and tighten the couplings by hand.
Replacing a Faucet Part
Faucets are a convenient and functional part of kitchen and bathroom plumbing. Unfortunately, they can wear out and require replacement parts to function properly. Fortunately, replacing faucet parts is generally fairly simple for homeowners that are comfortable with basic DIY plumbing. However, if you’re not familiar with the basics of repairing faucets, it might be worth hiring a professional plumber instead. A professional will have the specialized tools needed to ensure the job is done correctly.
Before replacing any parts, make sure you turn off your home’s water supply valves. This will prevent any unwanted water from shooting out during the repair process, reducing risk of injury and mess. Additionally, it will allow you to work without worrying about the possibility of water damage to your property and possessions.
After the water is turned off, take a moment to drain the sink. This will reduce the amount of water left behind after disassembly and help you to identify any leaks or problems you may encounter during the repair process. It’s also a good idea to cover drains with a drain plug or an old rag to keep small faucet parts from falling down the drain and becoming lost.
If your leak originates near the base of the faucet, it could be caused by a loose packing nut or adjusting ring. If the leak is close to the spout, it could be a problem with the washer that sits on the valve seat or a corroded valve seat. The latter is common in compression faucets, where mineral deposits can clog or erode the valve seat over time.
Once you have identified the source of your leak, you can remove the faucet handle, spout assembly, and valve stem to begin the replacement process. Before beginning, be sure to replace the valve seat washer to avoid further problems with your faucet. It’s a good idea to consult the manufacturer’s specs sheet or online support center to ensure you’re purchasing a replacement that’s an exact match for your faucet model.
A leaking faucet can lead to expensive water bills and long-term damage to surfaces, appliances, and even structures like walls and floors. It can also create a breeding ground for dangerous mold. To avoid the headaches associated with a leaking faucet, it’s important to fix it as soon as possible.
Replacing a Faucet Handle
A stuck faucet handle is one of the most common plumbing problems. The good news is that it’s often easy to fix, especially if you know what to look for and have the right tools on hand. Whether your handle is difficult to turn because of mineral buildup or because it just feels loose, these tips will help you get it back in working order.
First, make sure the water is turned off completely. If you don’t, you could be sprayed with hot water or end up losing a small screw or piece of debris down the drain. Cover the drain with a rag or piece of tape to prevent this from happening. Once the water is off, you’ll want to remove the handle and decorative cap (if applicable) to expose the screw holding it in place. Use a flathead screwdriver to pry off the decorative cap and the set screw underneath. Once the set screw is removed, pull up on the handle to remove it from the stem.
If the handle is still hard to turn, it may be due to mineral buildup or corrosion that’s building up inside of it. Cleaning it with vinegar or another type of degreaser should help loosen it up. If the problem persists, you can try rubbing the inside of the handle with steel wool to smooth out the surface and reduce friction. Alternatively, you can try using a penetrating oil such as WD-40 around the base of the handle where it attaches to the stem. If the handle is still difficult to turn, you should replace it.
Once you have the replacement handle in hand, it’s time to reassemble the faucet. Start by screwing the new handle onto the stem, making sure it’s tight and aligned correctly. Next, add a washer and an O-ring to the cartridge (if applicable). If you’re replacing the cartridge, be sure to bring the old one with you to the hardware store so you can find an exact match. After installing the cartridge, use plumber’s grease to lubricate it so it inserts smoothly into the faucet body and doesn’t leak.
Replacing a Faucet Cartridge
Cartridge-type faucets are prone to developing problems that can cause them to leak. If you’re experiencing persistent dripping when the faucet is turned off, the cartridge may need to be replaced. This is a relatively simple process that can be done by anyone with basic plumbing skills.
Shut Off the Water Supply
Before beginning any work, shut off the water supply to the faucet by turning the valves under the sink clockwise. This will prevent any accidental water flow while you’re working.
Remove the Faucet Handle
Once the water supply is off, you’ll need to remove the handle in order to gain access to the cartridge. Depending on the type of faucet you have, this may involve unscrewing a screw that secures the handle or removing a decorative cap or retaining nut.
The Cartridge
The cartridge is the component that regulates the temperature and volume of water flowing from the faucet. It’s held in place by a retainer clip that’s usually secured with a nut inside the faucet body. Older faucets may have a large retaining nut that’s exposed once the handle is removed, while newer models may have a decorative collar or other components that need to be removed before you can reach the retaining nut.
Once you’ve accessed the retaining nut, use an adjustable wrench or channel-type pliers to loosen and remove it. Once the nut is off, carefully remove the cartridge from its housing.
Reassemble the Cartridge
Reassemble the new cartridge by inserting it into the cartridge housing, taking care to align the cartridge tabs with the retaining clip notches or slots. You may need to gently twist the cartridge a bit while inserting it to help ensure that it is properly seated.
It’s a good idea to lubricate the cartridge, particularly if the replacement kit includes it. This will facilitate smooth operation and extend the life of the cartridge and other parts in the faucet. Once the cartridge is in place, reattach the retainer clip and then install the spanner cap, if applicable. If the replacement kit does not include a spanner cap, you can get one from your local hardware or home center. Once the cartridge and faucet are reassembled, test the water flow and make any necessary adjustments. Once you’re satisfied that the faucet is functioning properly, turn the water supply back on gradually, checking for any signs of leaks or other issues.